Here you will find the documentation for the 2D world generator asset package. It is not necessary to
go through all the documentation below. This documentation aim at covering as extensively as
possible this resource package in order to facilitate its integration with existing/soon to be projects .
Using it the most basically only require the drag and drop of a prefab into your scene hierarchy.
Note: If you go through the more technically detailed part of this documentation, some design
choices may feel odds or cumbersome and they probably are. Each design decision have been made
in a way to increase the performances of the rendering system, in order to allow massive map size
and increased unzoom level meanwhile keeping some decent performances. Or to be able to be
easily modified without having to dig too deep into the core of the script.
If you have any questions, bugs or suggestions please contact us at support@moula.world
How to use (basics)
Just drag the GameManager prefab from the prefab/logic/resources folder into you scene tree and you’re good to go !

Controls
The world generator come with very basics controls :
• Arrow keys, wsad: move around the map
• Mouse wheel: Zoom/Unzoom
Scripts options
CameraHandler.cs

Max Unzoom : The maximum unzoom value for the camera, the further away the camera is, the more tiles will have to be rendered, resulting in degrading performances. The default value (50) is intended for debug purposes only and should absolutely not be kept that high (a value around 10 is recommended).
Min Unzoom : The minimum unzoom value for the game camera.
Mouse Wheel Zoom Multiplier : Factor by which the zoom value will increase / decrease when scrolling the mouse wheel.
Speed : Speed of movement on the map.
Render.cs

Base Tile : An empty game object with a Sprite Renderer used to render the tiles. This empty game object will then be modified by the script to match the current tile properties.
Pre Compute Tile Name : The rendering engine can render the tiles using 2 different way :
– on the fly rendering :
Pre Compute Tile Name → unchecked.
Due to the naming convention of the tiles (explained later in this document) the rendering engine will find the appropriate tile image based on the tile value and it’s surrounding.
Pros : It is great to automatically account for any changes in the map without further work. As the tile will be recalculated constantly.
Cons : Much slower.
– Pre computed rendering :
Pre Compute Tile Name → checked.
The rendering engine will compute the tile value for all the map at launch and will use this value in every rendering passes.
Pros : Much faster.
Cons : Any change in the map must be recomputed manually (The render method ComputeAllTileNames() can be used for convenience).
–Tileset name :
The name of the tileset to be used by the map. Must be in the tiles/resources folder.
–Ppu :
The pixel per unit used by your tileset / 100. Here, 0.16 for 16×16 tiles.
WorldManager.cs

Sea Level : The amount of sea in the map in percentage / 100 (here 70 % → 0.7)
World Size x : The world map horizontal size in tiles.
World Size y : The world map vertical size in tiles.
Granularity : The higher the number the bigger the landmasses. Lower values will result in smaller islands.
Mountains Percent : Percentage of mountains across the map.
Dirt Percent : Percentage of dirt/ rough terrain across the map.
Sand Percent : Percentage of desert terrain across the map.
Forest Percent : Percentage of forest across the map.
Cactus Percent : Percentage of cactus across the map (cactus can only spawn on deserts).
Highest : The tallest a mountain can be (value in tiles).
Trees Nb : The number of different trees to be used ( they will be grouped by kind).
Seed : The seed used for the world (If set to RANDOM, a random seed will be used). The seed value will be display in the Debug Log while generating the map.
Tiles Kind : The different possible terrain tiles. You can add many more different kind of terrain if you have the proper tiles named for it (see ….). Important : They need to be ordered with z values ( water ← sand ← dirt etc.) The higher index will be considered « covering » the lower indexes (It is used to display the transition between the different kinds of terrain).
Active Z Levels : The number of active Z Levels ( by default 3 : The terrain, the grounded object, the object which can be displayed on top of other object (tree tops, mountains top etc.))
Tile naming
In order to render the tiles with the less overhead possible, the tiles follow a strict naming system for the engine to easily find which tiles goes where. The included tileset is already broken down and named accordingly, if you keep using the provided assets, you don’t need to read the following section. But if you plan on using your own assets, you will need to break it down in unity and name each tile using the naming convention below.
Terrain :

The naming convention goes as follow : upperTerrain_lowerTerrain_transitionType_direction
upperTerrain : The terrain which have a higher index in the tile kind array of the world script.
lowerTerrain : The terrain which have a lower index in the tile kind array of the world script.
transition : There is 2 kind of transitions availables :
-
outer : outer corner of the upperTerrain over the lower terrain (aka the upperTerrain is « around » the lowerTerrain).
-
inner : inner corner of the upperTerrain over the lower terrain (aka the lowerTerrain is « arround » the upperTerrain).
direction : Direction is a cardinal direction of where is the upper terrain on the tile.
-
NW : the upper terrain is in the north west corner of the tile.
-
N : the upper terrain is in the north of the tile.
-
NE : the upper terrain is in the north east corner of the tile.
-
W : the upper terrain is in the west of the tile.
-
E : the upper terrain is in the east of the tile.
-
SW : the upper terrain is in the south west corner of the tile.
-
S : the upper terrain is in the south of the tile.
-
SE : the upper terrain is in the south east corner of the tile.
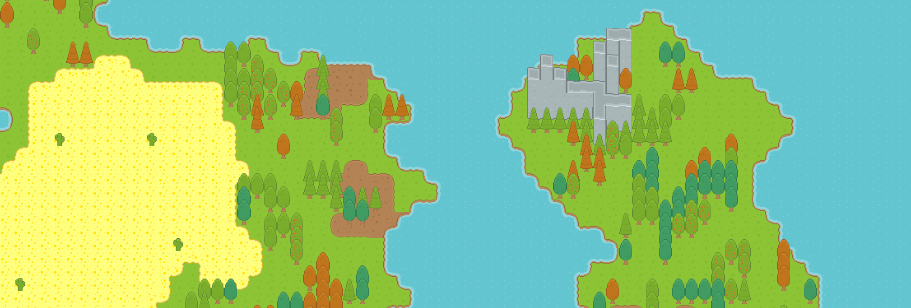
In doubt, please refer to the image above.

The tiles without transition are just name after their name in the « Tiles_kind » array of the World.cs script. Above, as an example are shown the one included with the world generator.
Mountains :

The naming convention for the mountain is pretty complicated and much more understandable by loading the sprite editor from the currently provided tileset but the theory goes as follow :
mountain_type_position
type : This is the type of the mountain, currently there is 2 types. Hence the value will be either 1 or 2.
position : This is a much complicated value which can vary greatly depending on which part of the mountain we want to render it can be of the following forms :
-
SINGLE_height : This indicate a single one tile wide mountain. Height will be described below.
-
height_horizontalPosition : ex : mountain_2_BOTTOM_LEFT, mountain_2_TOP_RIGHT.
The height is the current part of the mountain to be rendered depending on which height we are rendering. There is tree possible values : BOTTOM, CENTER, TOP. Corresponding to the bottom of the mountain, the generic center (each part of the mountain which is neither the BOTTOM nor the TOP).
The horizontalPosition is also broken down into 3 different sprites (LEFT, CENTER, RIGHT) where center is everything which is not LEFT of RIGHT.
-
TOP_verticalPosition : this if for vertical tops. Where vertical position can take several values.
Ex : mountain_2_TOP_TOP, mountain_2_TOP_CENTER, etc.. verticalPosition follow the same rules as height above.
-
TOP_corner : this is used to describe a mountain top which is going 2 ways (a top corner).
Ex : mountain_2_TOP_BOTTOM_LEFT, mountain_2_TOP_TOP_RIGHT. The corner will indicate which corner of the tile is closed.
-
TOP_3Directions : This is used to describe a mountain top which is open in 3 different directions.
Ex : mountain_2_TOP_TOP_RIGHT_BOTTOM, mountain_2_TOP_LEFT_TOP_RIGHT. The 3 directions are the direction which are open.
-
TOP_4DIR : indicate a mountain top open in all 4 directions.
-
TOP_VERT_CENTER : The central tile which is neither TOP_TOP neither TOP_BOTTOM of a vertical mountain top line.
The mountains tiles naming convention can seems rather obscure and it is highly recommended to use the unity sprite editor on the current included tileset to see in more detail what it actually means. Having the tile images for reference.
Trees :

Trees are fairly straightforward : tree_treeNb_(top/nothing)
treeNb : the number of the tree. You can add as many trees kind as you want as long as you set the treeNb in the world script to the proper number of trees and that the corresponding tiles exists.
Top/nothing : is ommited if it isn’t the top of the tree. Or said « top » if it’s the top.
Script Roles
The role of each script is as follow :
Camera Handler (CameraHandler.cs) :
This script is used to provide basic controls for the world generator. It respond to input and move the camera accordingly.
It will launch the render of the map every time the camera moves.
Init (Init.cs):
This script is responsible to instantiate all the other scripts of the world generator in this order:
– world.cs
– cameraHandler.cs
– Render.cs
It will launch the generation of the map and the first rendering. The init script is crossed referenced in any of the other scripts. You can then access them with:
– World.cs: init.world;
– CameraHandler.cs: init.cameraHandler;
– Render.cs: init.render;
Render (Render.cs):
The render script display the map and find the tile to load depending on it’s surrending and the naming convention.
World (World.cs):
The world script is used to generate the world based on the parameters set in the editor.
World.cs
Here will be explained all the important part of the World.cs script. Some method and variable will not be explained here as they are considered not relevant for this documentation. If you want to dive further into the world script, please use the comments provided in the script itself.
Map concept:

The map is organized as a grid. Starting in the bottom left corner (0,0) to the top right corner whose values are the size of the map -1.
There is one instance of the grid for each zLevel, by default 3.
The grid hold the value for each tile. -1 means it’s empty.
On the layer number 0 (terrain) the values in the grid are the index of the Tiles_kind array. With the default value it will then be:
0 for water, 1 for desert, 2 for dirt etc…
On the layer number 1 (mountain, trees, cactus) the values will be as follow:
– 1 : First kind of mountain (bottom tile)
– 2 : Second kind of mountains (bottom tile)
– 3 : First kind of mountain (central tile)
– 4 : Second kind of mountain (central tile)
– 5 → numberOfTrees + 4 : index for the tree. Starting right after 4 and ending at the last index for trees + the initial 4 numbers reserved for the mountains. For example with 3 kind of trees the indexes for the trees will be: 5,6,7
– numberOfTrees + 5 : Cactus. Index is calculated as the 4 reserved for mountain + the indexes reserved for the trees.
On the layer number 2 (mountain top, tree top) the values will be as follow:
– 1 : First kind of mountain
– 2 : Second kind of mountain
– 5 → numberOfTrees + 4 : The top of the tree. The 4 indexes offset is kept for consistency purpose.
Important methods:
public void Initialize()
Is used to initialized the world and start the world generation. Will output the seed used.
public void GenerateNewWorld()
Threaded world generation called by initialize. Please do not call this function directly. Use Initialize() instead!
public void GenerateMountains()
Generate the mountain range. Please look into the function to get more details about it.
Vector3 putAdjacent(List<Vector2> _tiles, int zLevel, int[] acceptedReplace)
Put a tile adjacent to another tile of some kind.
_tiles: the tiles list to look into (of the kind we want to place)
zLevel: the targetted zLevel to look into
acceptableReplace: The tiles kind that we can replace with the tile we want to place.
It will return a Vector3 with the position, where the z value is the zIndex.
int hasAdjacent(int[,,] inArray, Vector3 pos, int val, int[] mask = null, int operand = EQUAL)
Find the number of adjacent tiles in grid of some kind.
InArray: the grid to look into
pos: the position of the tile we are looking neighboors for
val: the value of the adjacent tiles we want to detect around
mask: the mask to apply (please see masks below)
operand: the operand to be applied to the value looked for.
for example: if the operand is EQUAL and the value is 1 hasAdjacent(); will return the
number of cells containing 1 depending of the provided mask. If the operand
is SUPERIOR_EQUAL and the value is 0 (sea) it will return all the adjacent cells being higher than
sea level depending of the mask provided.
hasAdjacent will return the number of matching neighboors.
Vector2 getDifferentNeighbour(int[] allowed, Vector3 pos, int[,,] grid, int[] mask = null)
Get a neighbooring tile which value is different from the current tile.
allowed: array of allowed kind of tiles to be looking for.
pos: Position of the current tile we are looking neighboor for (x, y, zLevel)
grid: The grid to look into.
mask: The mask to be used (please see masks below).
Return a Vector3 (x, y, zLevel) of one of the different neighboor around the current tile, if any. Will return (0,0,0) if none can be found.
public void smoothSurface(int index, int replace, int zLevel, int passes = 1)
Will attempt to remove orphan instances of one kind of tiles to have a map smoother. For example one tile of water completely surround by grass, or one tile of grass completely surrounded by water.
index: The kind of tiles we want to smooth out
replace: What tile must replace the orphan tile
zLevel: the zLevel we are operating at
passes: repeat the smoothing process X times.
GeneratePatchesOf(int toPlace, int[] acceptableReplace, int smoothWith, float percent, int granularity, int[] unnaceptableAdjacent)
This function is a pretty flexible one, made to be able to easily add any kind of terrain to the map. It is currently used to place the dirt (rough) terrain and the desert. Feel free to call it during the map generation process with whatever terrain type you want to add (snow for example).
toPlace : The kind of tile we are generating patches of
acceptableReplace: The acceptable tiles we can place our new kind of terrain on top of.
smoothWith: What we should replace the orphan tiles of that kind with.
percent: How many percent of the whole map should be covered by this kind of terrain.
granularity: The higher the value the bigger patches it will be. The lower, the smaller scattered patches.
unacceptableAdjacent: array of unacceptable neighboor for this kind of terrain. (water for desert for example).
public void PlaceCactus()
As it says, it’s only role is to place catcus on desert. It have been made to show an easy way to place new kind of entities into specific kind of terrain. Feel free to copy it to place more entities into different kind of terrain.
public void GenerateForest()
Will generate the forests on the map. The different trees will be place by “patches” being next to trees of the same kind.
public void GenerateContinent()
The backbone of the world generator. Will generate the continent landmasses.
Masks:
Masks are a one dimensional array of 9 elements representing the nine possible positions relative to
the current value. They are organized as follow:
[NORTH_WEST, NORTH, NORTH_EAST, WEST, CENTER, EST, SOUTH_WEST, SOUTH,
SOUTH EAST].
The value for each of the values can be only 0 or 1.
0 meaning it is skipped and 1 meaning it is included. Looking for the height possible direction
around a cell would then result in the following mask:[1,1,1,1,0,1,1,1,1]
Some useful masks such as this one are already defined in the script, as detailed in the properties
listing.
Properties:
The public properties displayable on the editor will not be covered here as they have already been covered in the script options section. Only the most relevant properties will be covered here, please refer to the comments in the script itself if you want to have details about all the properties of this script.
public bool isDoneGenerating : Flag to know if the world is done generating
private Thread generateWorld: The thread which is used to generate the world
private Vector2[] translations: Useful array of translation based from the center to be applied to coordinate. For example the Vector2(-1,1) when applied to a position (1,1) will become (0, 2), the north west corner of (1,1). Therefore they are labelled in the comment to which cardinal direction each of them refers to (NW, N, NE etc…)
private const int INFERIOR_EQUAL, INFERIOR, EQUAL, SUPERIOR, SUPERIOR_EQUAL: operand constants used for the hadAdjacent() method. Please refer to it above.
Private static readonly int[] C_NW : mask for north west corner (W, NW, N)
Private static readonly int[] NW : mask for north west corner, 1 tile (NW)
Private static readonly int[] C_N : mask for north (NW, N, NE)
Private static readonly int[] N : mask for north, 1 tile (N)
Private static readonly int[] C_SW : mask for south west corner (W, SW, S)
Private static readonly int[] SW : mask for south west, 1 tile (SW)
Private static readonly int[] C_W : mask for west ( NW, W, SW)
Private static readonly int[] W : mask for west, 1 tile (W)
Private static readonly int[] C_NE : mask for north east corner (N, NE, E)
Private static readonly int[] NE : mask for north east corner, 1 tile (NE)
Private static readonly int[] C_E : mask for east (NE, E, SE)
Private static readonly int[] E : mask for north east, 1 tile (E)
Private static readonly int[] C_SE : mask for south east corner (E, SE, S)
Private static readonly int[] SE : mask for south east corner, 1 tile (SE)
Private static readonly int[] C_S : mask for south (SW, S, SE)
Private static readonly int[] S : mask for south, 1 tile (S)
pirvate static readonly int[] HEIGHT_DIRECTIONS: mask for the 8 possibles directions (except center)
private static readonly int[] NINE_DIRECTIONS: mask for the 8 possibles directions (including center)
private static readonly int[] FOUR_DIRECTIONS: mask for 4 directions (N,S,E,W)
public int[,,] grid : 3 dimensional array to store all the map information. [x,y,zLevel]
Render.cs
Rendering concepts:
The rendering use twice as many zLevels as are currently implemented in the world.cs. This is because of the pooling system. In order to save time on rendering, all the unnecessary object are not rendered and the necessary one get an index from the pool. Therefore, because there is multiple zLevel, each zLevel value of each grid can have a different index in the pool.
Ex: for the basic settings (3 zLevel) the activeZlevels will be : 0,1,2
the total zLevels will be 0,1,2,3,4,5
zLevel 3 → pool reference of zLevel 0
zLevel 4 → pool reference of zLevel 1
zLevel 5 → pool reference of zLevel 2
this, of course can result in very big arrays especially in very big map size. However it have appeared to performed better than index calculation in order to retrieve the index for a particular set of 3 coordinates (x,y,zLevel) using other means of storage (list, dictionary etc…) which is why this technique have been implemented.
Methods:
public void Initialize()
Used to initialized the render script. Load all the tiles from the tileset and compute the grid if the “pre compute tile names” option is selected.
public void ComputeAllTileNames()
Used to compute all the map tile names. Put into an easy to call method in order to be called on map change if needs be.
public void UpdateCellNb()
Update the number of cells displayable on the screen.
public string getTileName(int i, int j, int zLevel)
find the name of the tile to be displayed following the “naming convention” stated earlier in this documentation.
i: the x value of the tile
j: the y value of the tile
zLevel: the zLevel value of the tile
public void Draw(bool first = false)
draw the current viewport of the map.
first: flag to indicate if it is the first time we are rendering the map or not.
Properties:
Here is the most relevant properties of the render script. The public one editable in the inspector will not be covered here as they have been on the script options section of this document. For an exhaustive list please refer to the comment in the script itself.
Dictionary<string, Sprite> sprites : Reference of all the sprites in the tileset loaded.
cellNbX : The number of displayable tiles on the horizontal axis depending on the screen size and zoom value
cellNbY: The number of displayable tiles on the vertical axis depending on the screen size and zoom value
List<GameObject> pool: A list of all the game object which have been loaded in the pool
List<int> freeIndexes: List of indexes which are free to be reused in the pool
private string[,,,] tilenames: List of all the pre computed tile name for all the zlevel of the maps if the option have been checked beforehand.
Init.cs
Methods:
void Start():
Unity method, instantiate the 3 others scripts and call Initialize();
void Initialize():
Initialize the CameraHandler and the World (start the generation)
void LateUpdate():
Check if the world is done generating, and if it is: Initialize the render and proceed to the first render. Then Init.cs will no longer do anything.
CameraHandler.cs
Methods:
public void Initialize():
Get the main camera and configure it.
Void Update():
Unity function. Check for inputs and re render the map accordingly.
Using the Object Pooling Rendering and the World Creator without game
manager and Inputs Handler
If you wish to use the Render.cs script and want to generate a new world but don’t want to use the
provided Init.cs and CameraHandler.cs you need to call the method Draw(); by yourself every time there is a movement in the scene.
If it is the first render, you would need to pass it “true” as parameter.
Using only the World Creation Script
If you wish to only use the world creation script and none of the other script provided, just discard
all the other scripts and call the Initialize(); function of the World.cs script whenever you
want to generate a new world.
Be aware that you will have to use your own rendering system as
nothing will be rendered by default, only the grid and objects arrays will be populated.
You can then use the grid in your own rendering logic to display the map on screen.
Recomputing the tile names on map change
If you opted to auto compute all the time name before the rendering happen and then need to change some tiles because the map changed. You have two options:
– Call the ComputeAllTileNames() method of the Render.cs script to recompute the tile name for all the grid (very intensive if your map change often and not very recommended because of that).
– Identify the tiles which need to be refreshed (the tile changed and it’s neighbooring tiles at least, but it can be much more if for exemple a part of a mountain disappear). Once you’ve identified the tiles that need to be renamed, call the getTileName() for each tile with it’s position and zLevel and change the value in the tilenames array.
Ex: for a tile with the coordinates (1,1,0) (x,y, zLevel)
tilenames[1,1,0] = this.getTilename(1,1,0);
if you need to do that outside of the render.cs script, you will need to switch the tilenames variable from private to public.
FAQ
What should I do if I encounter a bug or an unexpected behavior?
Please write to us at support@moula.world and we’ll get it fixed as soon as possible.
Which map sizes are supported?
Any kind of map size are supported, if you are using the object pooling provided with the Render.cs
script the performances shouldn’t be impacted by the size of the map. Be aware that the largest the
map, the longest time it will take to be generated and the higher will be the memory usage of the
game. Other than that FPS should remain stable regardless of the map size.
Something isn’t clear in the documentation and i would need extra informations.
If what you don’t understand is related to the scripts please first start by looking at the comments
inside the script. If it’s something else or your issue isn’t still fixed drop us a mail at
support@moula.world with a description of your issue and suggestion on how to improve this
documentation. This documentation is a work in progress and will be updated following the
recommendations and the need of the users.
How can i add more objects than just the ones included?
You will need to write your own algorithm in order to populate your new objects on the map. You
can take a look at the way current objects are populated and modify it to suit your need. The PlaceCactus() method of the World.cs is an easy one to take an example of.
You will as well need to add the naming convention the the getTilename() method of the Render.cs script in order for the rendering to find the proper tile.
You will need to name it accordingly using the “unity sprite editor” from your tileset.
Then regenerate the sprite atlas.
Once that is done it will be automatically rendered with the other objects.
How can I add more kind of terrain?
It have been made easy to add different kind of terrain.
Create the graphical resources for the new kind of terrain, and split it in the tileset using the name convention mention earlier in this document.
Add the new terrain kind in the “tile_kinds” array in the editor for the World.cs script.
Use the method GeneratePatchesOf() in the World.cs in the GenerateNewWorld() method. And it will display accordingly !
What is the seed and how to use it?
The seed is a random string which is used to generate the world. If you keep its value at RANDOM (uppercase) it wil generate a random seed each time you generate the world. You can replace that value to any string. The map will always be the same, if the seed is the same. If the seed is set at RANDOM the seed will be randomly generated.
During the generation, the world generator will write the seed in the Debug Log of unity. You can copy it from there and reuse it to get the same result. It allows you to not have to save the massive array of the map but uniquely the tiny seed generated!
How can i add more varieties of trees?
Inscrease the number of trees on the “Trees Nb” options of the World.cs. And make sure the required tree tile exist in your tileset. (Split it and name it with the unity sprite editor).
How can i add one or several characters moving around?
You would have to add it to the grid (zLevel 1 is recommended).
Then reference the corresponding tile name in the getTileName() method of the render.
Name and split the correct tile from the unity sprite editor on your tileset.
Update the position of your character as it moves in the grid. To forget to refresh the getTilename() after each movement.
How to handle collision?
Use the grid[,,] array of the World.cs script. You can easily find what is surrounding your character by looking at the value of the neighbooring cells. If the value of the cell your character wants to go to is not passable, forbid the movement.
Performances are bad! I get low FPS!
Please check your unzoom max level. By default the unzoom max level is set extremely high (50)
which force your computer to render a gigantic grid on each movement! It is a value
which is intended for testing only and it is recommended to keep the maximum unzoom at 10 at
most.
What are the mechanics in place to improve performances?
There is a lot of bigger and smaller tweaks implemented in order to get the better of the Unity
engine. First the render use an object pooling system which avoid generating thousands of objects
when generating the map but instead reuse the already instantiated objects. Here are some more:
• Some functions as the Mathf.Min() and Mathf.Max() have been discarded and replaced by
more basic logical conditions in some cases.
• Sprites are stored in a separate array in order to minimise the calls to getComponent.
• The rendering system calculate the difference in viewport between the current viewport and
the last one, in order to render / hide only the difference between the two.
• and much more…
Obviously nothing is perfect and if you have a suggestion on how to improve things even further,
we would be glad to hear about it! Contact us at support@moula.world.
How easy it is to use custom assets?
You can easily import your own tileset. Though you would have to split it in the unity’s sprite editor and name all the tiles you use according to the naming convention stated in that document. Then you’ll have to generate a sprite atlas from unity and you’ll be all set 🙂
What assets are included by default?
The assets included by default are a modified version of the Kenney assets that you can find here:
http://kenney.nl/assets. According to their license you are free to reuse them in your game as well.
Some tiles are not rendered properly.
Make sure, the tiles are correctly named in your tileset resource. If the engine cannot find the corresponding graphic for the tile it will print the missing tile name in the Debug Log.

